Product Photography: Part 3

It's a little bit of a gloomy morning here in northern New England so I decided to take advantage of the more naturally diffused light. May as well put these clouds to good use!

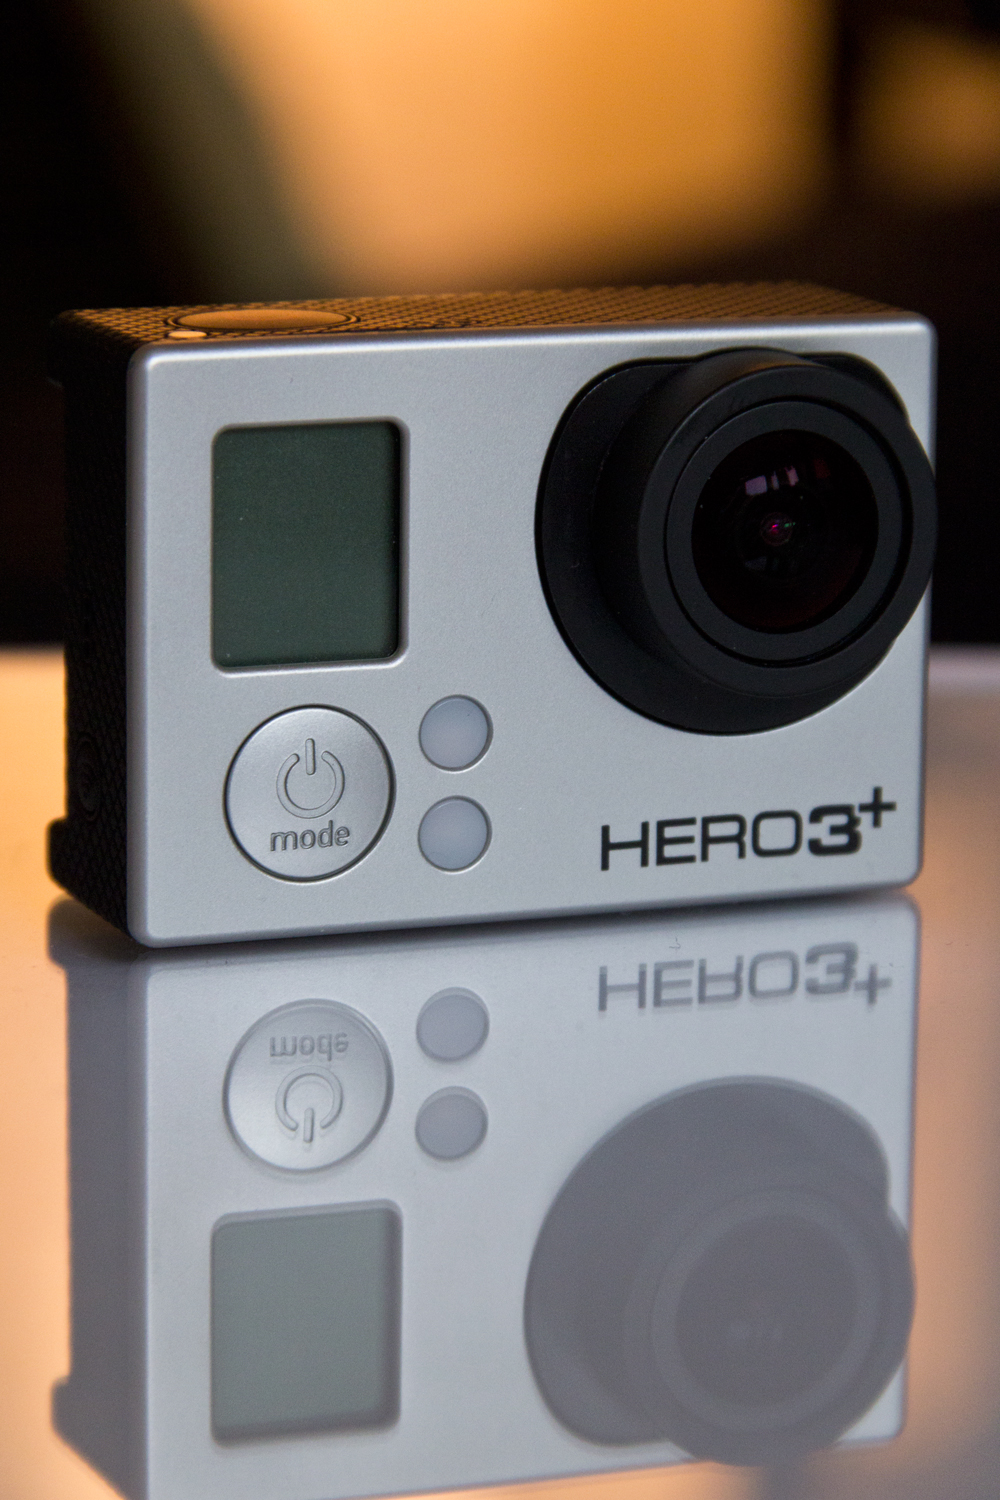
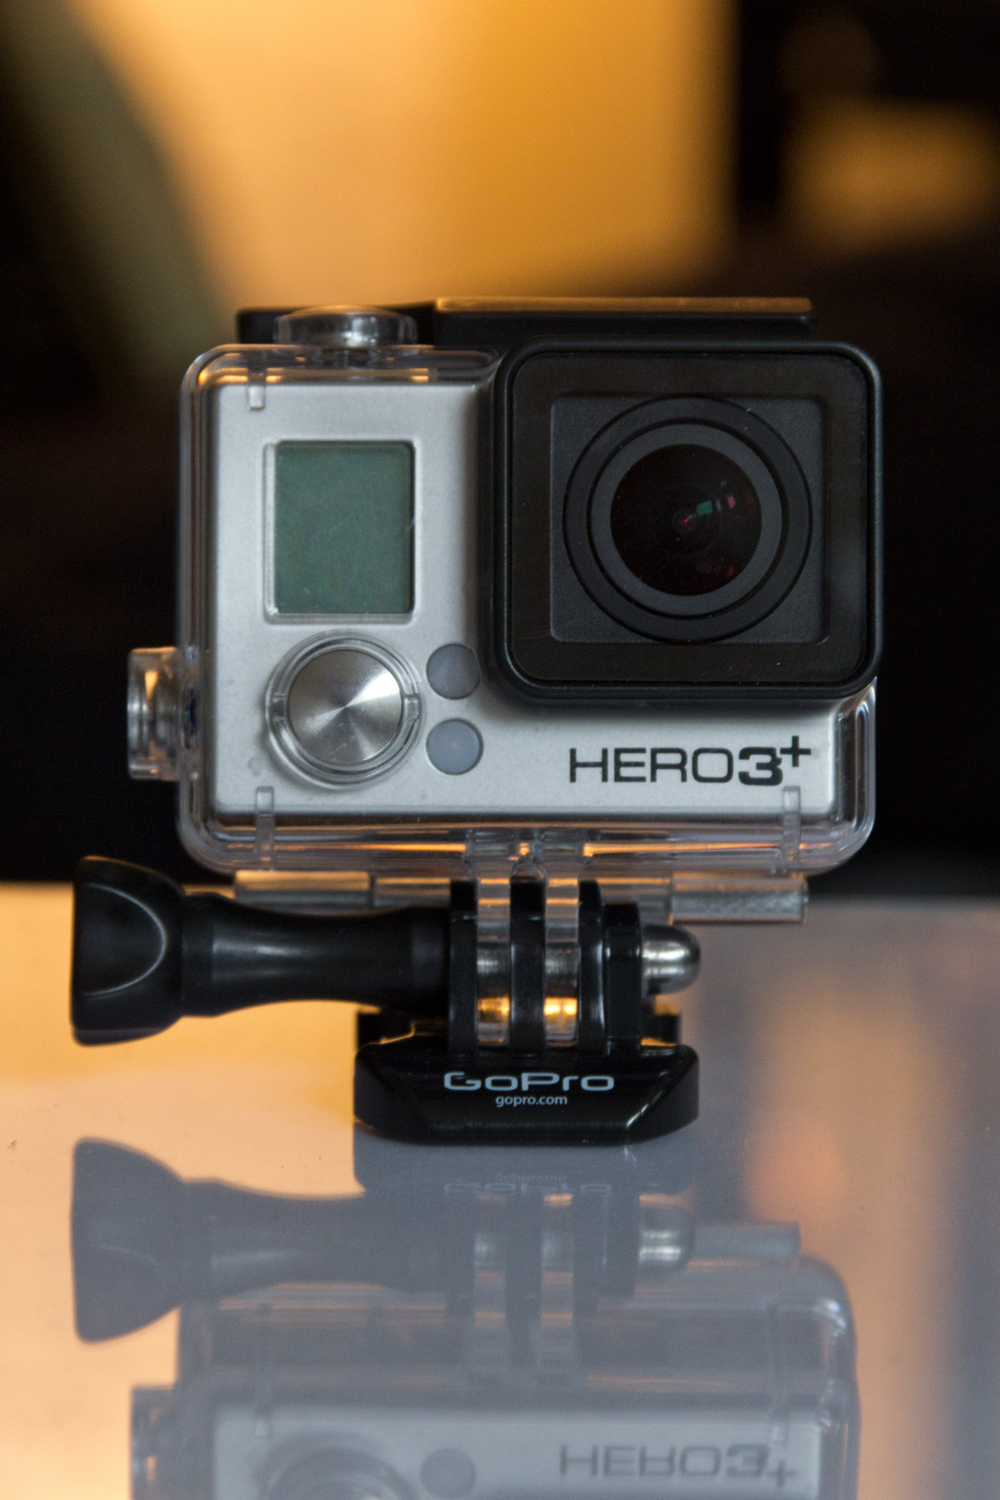
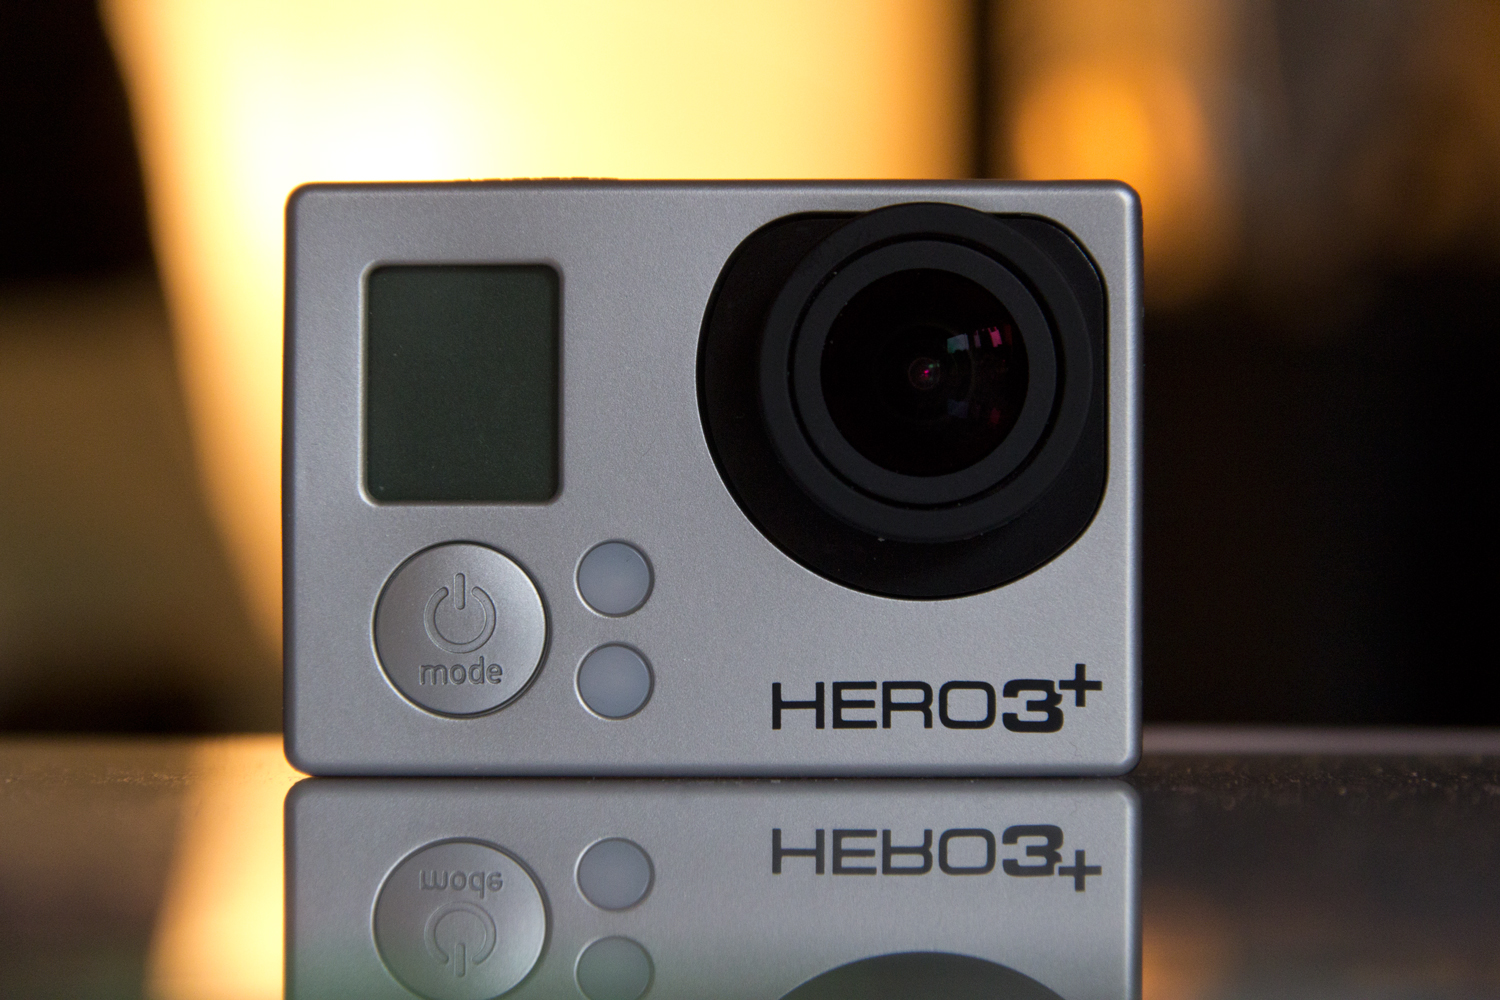
This time I faced my subject more towards the windows because the light was a little softer. I also wanted to make sure I got a little bit of reflection in the lens of my GoPro. Since it's too dark in my office for window light alone, I turned on the paper lamp in the corner and got this nice soft yellow light. THIS is the "hair light" I was looking for yesterday. It threw off the white balance a little bit, but it wasn't anything I couldn't correct. 

I was using the glass again and this time I actually propped it up a little higher so I could shoot more comfortably. The light from behind the GoPro really helped with isolating it from the background on both the subject plane and the reflection pane. I got a much stronger reflection this way. I used the kit lens again all the way at 135mm, but I decided to go up to f/8 to make sure the GoPro was in focus from front to back. Yesterday I was running into some depth issues at f/5.6. 

The background light was definitely helpful this time. I just need to find a way to make it fill the entire frame now... probably a large bed sheet or over-sized paper would do the trick. It would no doubt soften the light even more, but it might be worth trying. Now I just need to get some C stands...

More product photography research

I unfortunately don't have the means to set up a mini studio here at home, so I'm at the mercy of the tools in my office. Luckily, I have a small pane of glass, a step ladder, and a sunny day. 

I put a few sheets of paper under the pane of glass to hide the step ladder, placed my subject (a KidRobot Dunny figurine) on the glass, and then positioned everything so the light from my windows was coming in to the side of the subject. 

Right away I was getting some solid exposures. The sunlight was working perfectly and I was getting some decent background compression using my kit lens. The reflection off the glass wasn't as strong as I was hoping for, but it was working pretty well. I think if I had placed it over a darker surface I would have had more luck there. 

My only other problem was getting a really sharp horizon line. I still need to research the best way to do that. I don't want my subject all the way back on the pane of glass necessarily. I might need to have a much larger set up to achieve what I'm thinking of. Something like a 70-200mm so I can shoot at a smaller aperture but still blow out the background. A longer surface would be helpful too. I've found that the "angle of attack" on this is really critical. Right now I'm struggling with keeping the entire pane of glass in frame without showing the edges. It's sacrificing my composition a little bit, but there's time to tweak that still. 

Lastly I put my 430EXII speed light on slave mode and popped it in back of my subject to act as a "hair light". The result wasn't perfect... I should have bothered to lower the power even more, but the result I have here is usable. It definite helps the figurine pop off the background a little bit. I just don't like the lighting as much. Too hazy in the foreground... 

Check out my examples and if you have any tips on product photography please drop me a line! I'm really enjoying exploring this so far. 

7/4/13 - Fireworks

Where would an aspiring photographer be without some Fourth of July fireworks photos?!  

Last night I headed down to Portsmouth to check out the fireworks display and attempt to take some photos. I shot about 40 frames, about half of which were keepers, and then chose 10 to post here. I've never shot fireworks before and I have to say, I'm pretty happy with the result.  

I shot in bulb mode on my 60D at ISO 160 (can you believe it?) Fireworks are pretty bright so having such a low ISO wasn't an issue. Got a nice rich black background and evenly exposed streaks. My average exposure was probably around 4-6 seconds, depending on how many mortars were in the air at a given time.  

I started out on my 40mm prime at f/22 (again, way dark!). Having such a tight aperture really helped with focusing. Obviously it's hard to focus on things you can only see for a few seconds. I later switched to my kit lens, the 18-135mm and had it set at f/22 as well. I mostly switched for the variety of crop. 

Speaking of crop: These fireworks were RIGHT on top of us, so getting a nice shot of the city was more or less out of the question. You gotta work with what you have, right? I'm really happy with the results! Some of them look like feathers, some look like the aurora, some look like "the network" you hear so much about, and some just look like fireworks.  

So enough chit-chat. Here's the photos. Happy Independence Day everyone.  

Canon 70-200mm

I'm always on the hunt for a new lens. I shoot on a Canon 60D and the kit lens it came with is...nice... but not the greatest. I absolutely love my 40mm f/2.8 pancake but I think I might be interested in the Canon 70-200mm. 

There are a few versions of this lens out there, the cheapest of which being an f/4. Not the fastest, but the price tag is hard to argue with. Maybe if I can get a good deal on a used model I'll scoop one up. It would be nice to have that kind of range in my tool bag. 

Any of my readers use a 70-200? What are your thoughts?  

Bethlehem, PA

If you follow me on Instagram you probably know I spent the weekend in Bethlehem, PA on a weekend trip. My fiancé and I were out there for a friend's wedding on Friday and have decided to make a whole thing of it. Needless to say, this place is awesome. I've taken hundreds of photos so far and I cannot wait to get some new stuff up here for you guys. 

For now, here's a preview image I did up in Snapseed of the Bethlehem Steel Stacks, plus one iPhone panorama just for fun! More coming soon!  Don't forget to click to see the full size! 

Bethlehem Steel Stacks Panorama

Bethlehem Steel Stacks

Canon 60D ISO testing

I finally found a few minutes to test out the ISO range on my 60D. I got basically what I expected, but one thing that suprised me was the dramatic drop in saturation at high ISO. The camera can reach ISO 6400 natively and then expand to 12,800. It's probably safest to consder these only usable in emergency situations... The noise is very high. Maybe if you're going for a "look", you won't mind it, but I find that doubtful. Anyway, check out my results! 

I shot all of these on my new 40mm f/2.8 pancake lens AT f/2.8. This can sort of double as a sharpness test, but I'll probably do more on that later. This is at ISO 100. Nice and bright. The wood grain in the guitar really shines here. 


I decided to jump right to ISO 800 to keep this test on the shorter side. No sense in going all the way through every setting. The guitar is a little less bright but still plenty usable. 

ISO 1600. The maximum range of my prevous DSLR. Things are starting to get a little noisy here, but I'd still use this image. I don't think the noise is unreasonable. I'd probably want to boost the saturation in Photoshop, however.

ISO 6400. Yuck. Faded, pale, noisy. 

Lastly and definitely least, ISO 12,800. This is the expanded ISO range. No thank you. Double yuck. 


And just in case you needed ANY convincing...